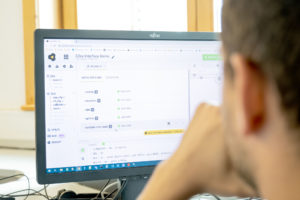
In “IoT development – simple, secure, fast. Develop and test in the studio!“, the structure of the studio has already been described. The CODEbed (CODEbed) is used for programming the IoT App itself, while the TESTbed (TESTbed) is available for testing the IoT App in the course of programming.
This article deals with the details for the development of IoT Apps. You learn which IoT App component is best to start with and which points to consider. Furthermore, project settings are explained that are important for a release of IoT Apps.
DDE as a starting point for IoT App development
After you have created a new project in rapidM2M Studio, the individual components must be implemented. But which component is best to start with?
IoT App components:
- Data Descriptor (DDE): Structure of the data (measurement data, configurations, etc.)
- Device Logic (DLO): Structure of the data (measurement data, configurations, etc.)
- Portal View (POV): Front-end of the IoT App on the IoT platform
- Backend Logic (BLO): Logic executed on the IoT platform
The DDE defines the structure of the configuration data and the historical data. This structure is required by the other components of the IoT App (DLO, POV, BLO) for interaction. That is why we always recommend starting with the DDE.
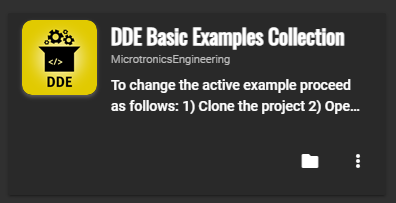
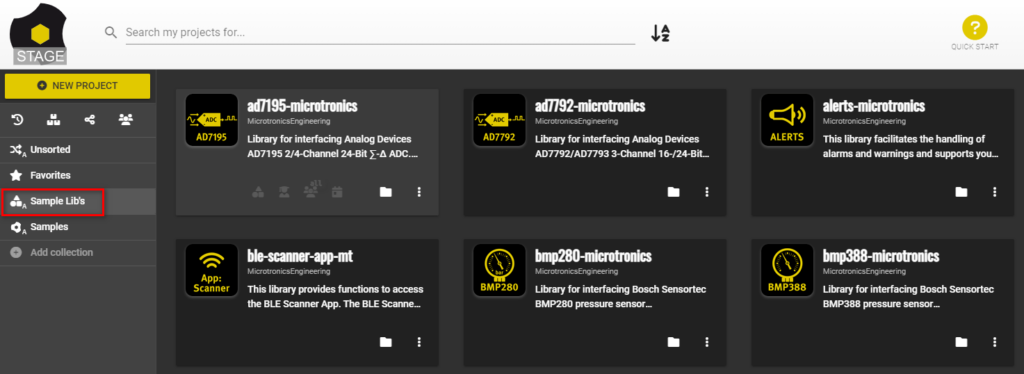
The “DDE Basic Examples Collection” in the rapidM2M Studio explains the practical application of the DDE and shows the possibilities and functions of the DDE using several examples.
Important points for the construction of the DDE
The other components of the IoT App depend on the data description in the DDE (Data structure). That is why it is important to think carefully at the beginning about how it should be set up and structured.
It is also important to consider which configuration options should be available to a user for the IoT app. An example is the recording and transmission interval or the transmission mode. If these fields are to be made configurable for users, they must be created accordingly in the DDE. For an explanation, see “Data structure” in the section “Division of a configuration memory block into individual data fields”.
For configurations that are frequently changed and configurations that are rarely changed, it is recommended to separate them into separate containers. This division of the configurations has the advantage that not all configuration fields have to be transferred to the device at the same time, thus saving data volume.
We recommend a similar procedure for the historically recorded data. In the case of historically recorded data, it makes sense to group measurement data that are recorded together into corresponding containers. In addition to reducing the volume of data, the separation into separate containers prevents the need to record measured values that are not yet available at the time of recording. For example, if there are two different sources for the measurement data and they are to be recorded at different times.
The structure of IoT Apps
The rapidM2M Studio offers various possibilities to structure a project. This makes maintenance easier, especially for larger projects.
In CODEbed, it is possible to create multiple files for a DLO/POV/BLO to separate an IoT app into different parts. This separation gives the IoT App a better structure and makes it easier to understand the different parts of the IoT App.
For further encapsulation of the IoT App sections, there is also the possibility to create folders in CODEbed, should it become necessary to group several files into one folder.
Libraries offer another way to structure and simplify an IoT App by moving the code for specific sections of an IoT App into a library.
The advantages of libraries at a glance
To keep the maintenance and development effort of IoT Apps as low as possible for you, there are libraries for frequently used components. A simple example is a library that implements a specific communication protocol, such as the Modbus Master library.
With a library, the code for a particular component is in a central location and can thus be maintained separately from the IoT App. This is especially interesting if the library is used for several IoT Apps, as improvements are then directly available in all IoT Apps.
The rapidM2M Studio provides libraries for frequently required functions.
Important project settings for an IoT App release
Once the development of an IoT App is complete, it is necessary to think about the release of the IoT App. There are a few things to consider so that the IoT App can be installed on the devices accordingly.
General IoT App information
Before an IoT App release, it is important to double-check general project information. The information Name, Icon, Description of the IoT App is visible when the IoT App is installed.
It is also important to check the crowd share of the IoT App. The crowd share includes the IoT platform on which the IoT App will be available once the release of the IoT App is complete.

IoT App Projekt Owner
The project “owner” is the owner of the project. This name is also displayed with the IoT App in the App Center. It is advisable to create a rapidM2M Studio account here, which is used for the administration and release of IoT Apps. In this way, IoT Apps are managed and published from a central location.
It is advisable to follow this process already during the first IoT App project in rapidM2M Studio, as this facilitates the management of IoT Apps later on.
It is possible to change the project “owner” later on. This can be useful when a developer initially creates a project, but the IoT App is to be published from a central account.
Required hardware platform and hardware/firmware versions
If IoT Apps are only suitable for a certain hardware platform or require a certain minimum hardware/firmware version, it is important to limit the installation of the IoT App to these requirements.
These restrictions become relevant when a user wants to install an IoT App on a device via the IoT platform. The restriction means that only IoT Apps that meet the requirements of the IoT App are displayed during installation. This prevents an IoT App from being installed on incompatible devices from the IoT platform.

During the development of the IoT App and the installation of the DLO via the TESTbed, this limitation is ignored to allow for easier development on multiple hardware platforms.
The version restrictions for hardware and firmware always specify a minimum version. Newer versions are thus automatically compatible.
Information for the “Required HW & FW” field
The rapidM2M hardware platform, the hardware version of the rapidM2M hardware platform and the firmware version can be queried via the IoT platform with the site list.

The firmware version and the identification (rapidM2M hardware platform and hardware version) can be found out via these settings.
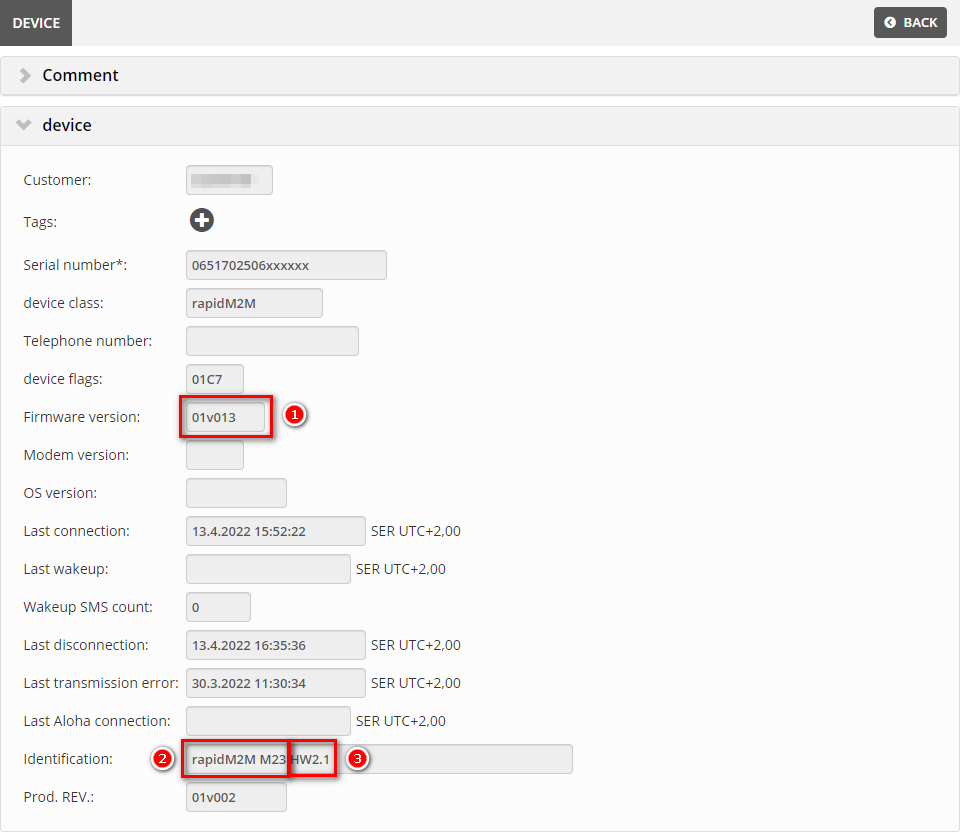
- Firmware Version
- rapidM2M Hardware Platform
- Hardware Version
Conclusion
Take the recommended procedure and structure into account when creating your IoT app and benefit from the management and deployment functions of the rapidM2M Studio and the IoT platform. With the recommended process, you create your application step by step – from the first idea to the release of the IoT App.